
Brown Butter Bites: The Ultimate Fat-Fueled Snack You Need in Your Life
Ever had that moment when you know you need more healthy fats but can’t stomach the thought of eating butter straight from the wrapper? Yeah, me too. That’s when I discovered brown butter bites – these little flavor bombs that transformed my fat-intake game. After making these divine morsels for months, I’ve perfected the recipe and am ready to share all my butter-browning secrets with you.
Whether you’re keto, carnivore, or just looking for a delicious way to get more quality fats, these brown butter bites are about to become your new obsession. Trust me, they’re ridiculously simple but will make you feel like a culinary genius. Let’s dive in!
- 1. Quick Stats
- 2. The Tools You'll Need
- 3. The Ingredients Breakdown
- 4. Choosing Your Butter
- 5. The Magic of Browning Butter
- 6. Let's Make These Butter Bites!
- 7. Flavor Your Fat: Fun Variations
- 8. How to Actually Eat These Things
- 9. Keep 'Em Fresh: Storage Success
- 10. Why These Butter Bites are a Game-Changer
- 11. Common Butter Bite Blunders
- 12. Your Burning Butter Questions Answered
- 13. Final Buttery Thoughts
- 14. Next Recipes To Try

Quick Stats
- Prep Time: 10 minutes
- Cook Time: 5-7 minutes
- Freezing Time: 30 minutes
- Total Time: 45 minutes
- Servings: 16-32 bites (depending on size)
- Calories: Approximately 100 calories per tablespoon
- Difficulty: Easy
The Tools You’ll Need
Before we jump into butter-browning action, let’s round up the equipment:
- Heavy-bottomed saucepan (seriously, don’t use your flimsy pans for this)
- Heat-resistant spatula (learned this the hard way after melting my 40-year-old spatula!)
- Silicone molds (various options work):
- Small 1-teaspoon flower/star molds
- Standard muffin tins
- Silicone ice cube trays
- Chocolate molds
- Measuring cup (for pouring)
- Hand mixer or stand mixer (for whipped version)
- Measuring spoons
Don’t have silicone molds? No worries! A small glass jar works perfectly fine too. Or line a baking sheet with parchment and make “butter bark” – how cool does that sound?
The Ingredients Breakdown
The Star of the Show
- Butter: 2 sticks (16 tablespoons/1 cup/226g) – salted or unsalted
That’s it! Seriously. Basic brown butter bites are a one-ingredient wonder. But wait… there’s more!
Optional Add-ins
- Bacon bits (for savory versions)
- Cinnamon or pumpkin spice (for fall vibes)
- Protein powder (if you want sweetened bites)
- Sea salt flakes (if using unsalted butter)
Choosing Your Butter
Let’s talk butter for a second. Is grass-fed worth the splurge? IMO, absolutely. The flavor is richer, and the nutritional profile is better with higher omega-3s and vitamins. But I get it – butter prices are brutal these days! 😫 Use what fits your budget.
Salted vs. Unsalted: For plain brown butter bites, I prefer salted butter. The salt enhances that nutty, caramelized flavor. If you’re planning to add sweeteners or flavors, go with unsalted to control the taste better.
The Magic of Browning Butter
Ever wondered why brown butter tastes so dang good? When you heat butter, the milk solids separate from the fat and start to caramelize. This creates that nutty, almost butterscotch-like flavor that makes everything taste better.
There are actually three stages of brown butter:
- Light golden – subtle nuttiness
- Medium amber – deeper caramel notes
- Dark chocolate brown – intense, almost coffee-like richness
I take mine almost to the edge of burnt for maximum flavor punch. Those little brown bits at the bottom? Pure gold. Don’t you dare strain them out!
Let’s Make These Butter Bites!
Regular Brown Butter Bites
- Start the melt: Place 2 sticks of butter in a heavy-bottomed saucepan over medium heat.
- Watch the transformation: Once melted, reduce heat to medium-low (about 4-5 on most stovetops). The butter will foam, then the foam will subside, and you’ll start to see brown specks forming at the bottom.
- Color check: For beginner butter-browners, use a light-colored pan so you can easily see the color changing. When it reaches your desired shade of brown (remember, darker = more intense flavor), remove from heat immediately.
- Cool slightly: Let the butter cool for about 5 minutes. Don’t pour scorching hot butter into silicone molds – not a fun cleanup!
- Transfer to measuring cup: Pour the browned butter into a measuring cup, making sure to scrape all those flavor-packed brown bits from the bottom of the pan.
- Fill molds: Stir occasionally as you fill your molds to ensure even distribution of the brown bits. Fill each cavity about 90% full.
- Freeze: Place molds in the freezer for at least 30 minutes until completely solid.
Whipped Brown Butter Bites
Follow steps 1-5 above, then:
- Proper cooling: Place your measuring cup of brown butter in the refrigerator for 10-15 minutes until it starts to thicken around the edges. THIS IS KEY! If your butter won’t whip, it’s probably still too warm.
- Whip it good: Using a hand mixer or stand mixer, whip the cooled brown butter until light and fluffy, about 2-3 minutes.
- Optional mix-ins: Now’s the time to add any flavorings or mix-ins if you’re using them.
- Fill molds: Spoon one tablespoon of whipped butter into each cavity of your mold.
- Freeze: Place in freezer until solid, about 30 minutes.
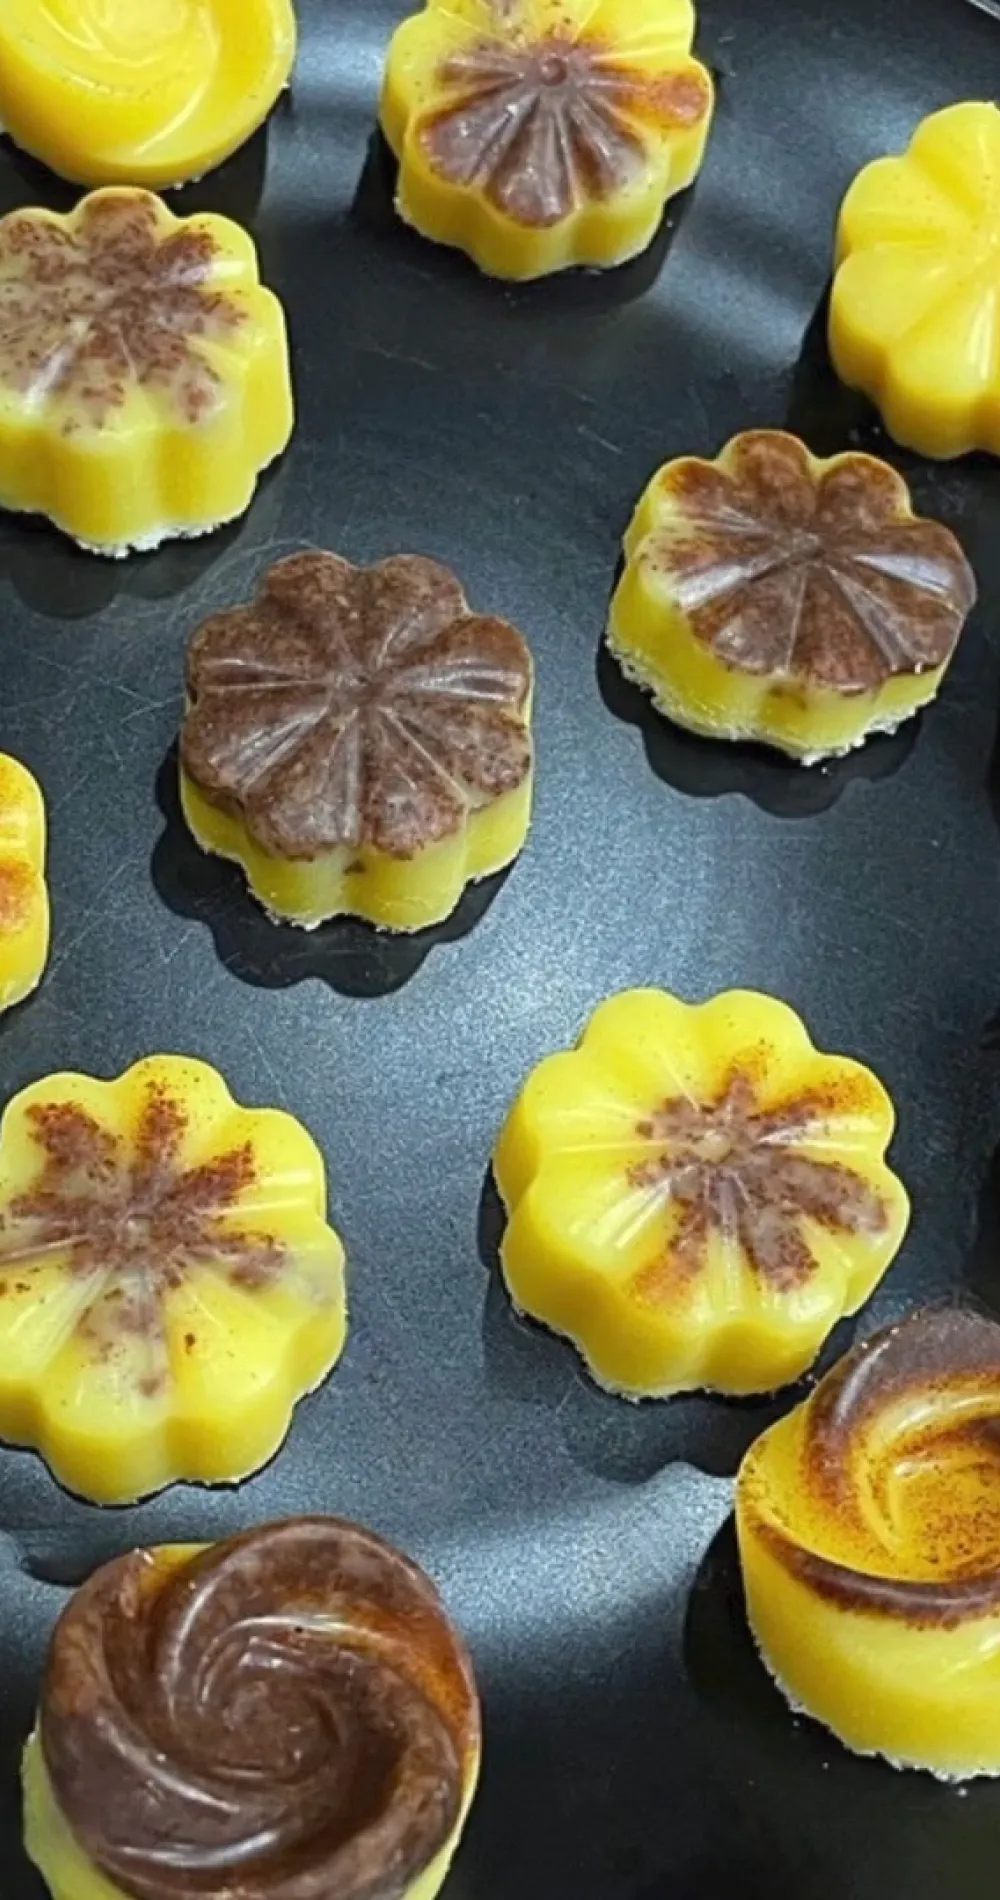
Flavor Your Fat: Fun Variations
While pure brown butter bites are heavenly on their own, why not get creative?
Savory Options:
- Bacon Brown Butter: Mix in crispy bacon bits before pouring into molds
- Herb Infused: Add rosemary or thyme to the butter while browning
- Garlic Butter Bites: Add roasted garlic paste to whipped brown butter
- Everything Bagel: Mix in everything bagel seasoning for a breakfast vibe
Sweet Options (if you’re into that):
- Cinnamon Brown Butter: Add 1/2 teaspoon cinnamon to whipped butter
- Pumpkin Spice: Mix in 1/2 teaspoon pumpkin pie spice
- Chocolate: Add unsweetened cocoa powder or chocolate protein powder
- Vanilla: A few drops of
vanilla extract works wonders
How to Actually Eat These Things
You might be wondering, “Am I just supposed to pop these in my mouth like candy?” Well, you can… but there are other options too:
- Melt over hot protein (steak, anyone?)
- Add to hot beverages (coffee, tea)
- Let one melt on your hot vegetables
- Spread on Carnivore Hash Browns
- Enjoy alongside eggs for breakfast
- Let one melt slowly in your mouth while you contemplate life choices (my personal favorite)
Keep ‘Em Fresh: Storage Success
These little fat bombs need proper storage:
- Initial freeze: Freeze until completely solid (about 30 minutes).
- Transfer to container: Pop them out of the molds and store in an airtight container.
- Storage options:
- Freezer: Up to 3 months (my preference)
- Refrigerator: 1-2 weeks
Pro tip: If storing in the freezer long-term, separate layers with parchment paper to prevent sticking.
Why These Butter Bites are a Game-Changer
When I first heard Dr. Bright recommend that women should eat a stick of butter daily for anti-inflammatory benefits (mentioned in the transcript), I thought, “How the heck am I supposed to eat THAT much butter?” These bites make it so much easier!
Benefits include:
- Precise portioning: Each bite is exactly one teaspoon or tablespoon, making tracking easy
- Enhanced flavor: Browning amplifies butter’s natural deliciousness
- Improved digestion: Many find brown butter easier to digest than regular butter
- Convenience: Grab-and-go fat source for busy days
- Appetite control: Quality fats help keep hunger at bay
Common Butter Bite Blunders
Don’t make these rookie mistakes:
- Walking away while browning: Butter goes from perfect to burnt in seconds. Stay vigilant!
- Whipping too soon: If your brown butter won’t whip, it’s too warm. Patience, grasshopper.
- Using the wrong spatula: Heat-resistant tools only! RIP to my vintage spatula that melted into my first batch.
- Overlooking the brown bits: These contain the flavor. Make sure to scrape the pan and stir while filling molds.
- Going overboard: These are calorie-dense! Start with 2-3 teaspoon-sized bites per day if you’re new to high-fat eating.
This website may contain affiliate links, which means that if you click on one of the product links, the website may receive a small commission at no extra charge to you!
Your Burning Butter Questions Answered
Q: Can I use ghee instead of butter?
A: Technically yes, but since ghee already has the milk solids removed, you won’t get the same browning effect or flavor.
Q: How long do these really last?
A: I’ve kept them in my freezer for up to 3 months with no quality issues. In the fridge, aim to use within 2 weeks.
Q: Will these melt at room temperature?
A: Yes! These should be stored cold and eaten relatively quickly once out of the freezer/fridge.
Q: Can I add sweetener without protein powder?
A: Absolutely. A little monk fruit or erythritol works fine, but add it after browning.
Q: How many should I eat per day?
A: Start with 1 tablespoon worth (1 larger bite or 3 teaspoon-sized bites) and adjust based on your personal fat needs and goals.
Final Buttery Thoughts
Let’s be real – incorporating healthy fats doesn’t have to be a chore. These brown butter bites have honestly revolutionized how I consume fats on my keto/carnivore journey.
The best part? They take less than 15 minutes of active time to make, and you’ll have butter bliss for weeks. Whether you’re keto, carnivore, or just butter-curious, give these a try. Your taste buds (and possibly your inflammation levels) will thank you!
And remember – don’t fear the fat! Just brown it, mold it, and enjoy it in these perfectly portioned bites. 🧈
Next Recipes To Try
If you enjoyed these brown butter bites, you might also love these fat-filled delights:
Keto Brownies – Pair with a brown butter bite for extra richness!
Carnivore Brownies – Another great fat-focused treat
Keto Brownie Cookies – Chocolate cravings, satisfied
Keto Hashbrown Casserole – Top with a brown butter bite for extra decadence
brown butter bites
Simple yet decadent brown butter bites that make getting your healthy fats delicious and easy. Perfect for keto and carnivore diets!
Ingredients
- 2 sticks (1 cup/226g) butter, preferably salted
- Optional: bacon bits, spices, or seasonings of choice
Instructions
- Brown the butter: Melt butter in a heavy-bottomed saucepan over medium heat. Once melted, reduce heat to medium-low and continue cooking until butter turns amber brown and develops a nutty aroma, about 5-7 minutes.
- Cool slightly: Remove from heat and let cool for 5 minutes.
- Pour into molds: Transfer to a measuring cup, then pour into silicone molds, distributing brown bits evenly.
- Freeze: Place molds in freezer until completely solid, about 30 minutes.
- Store: Remove from molds and store in an airtight container in the freezer for up to 3 months.
Notes
For whipped brown butter bites, cool browned butter in refrigerator until edges begin to solidify (about 10-15 minutes), then whip with electric mixer until light and fluffy before filling molds.
Nutrition Information
Yield 16 Serving Size 1 tablespoonAmount Per Serving Calories 100Total Fat 11.5gSaturated Fat 7.3gTrans Fat 0gUnsaturated Fat 4.2gCholesterol 30mgSodium 82mgCarbohydrates 0gFiber 0gSugar 0gProtein 0g