
Carnivore Cannoli: The Ultimate Low-Carb Italian Dessert You Never Knew You Needed
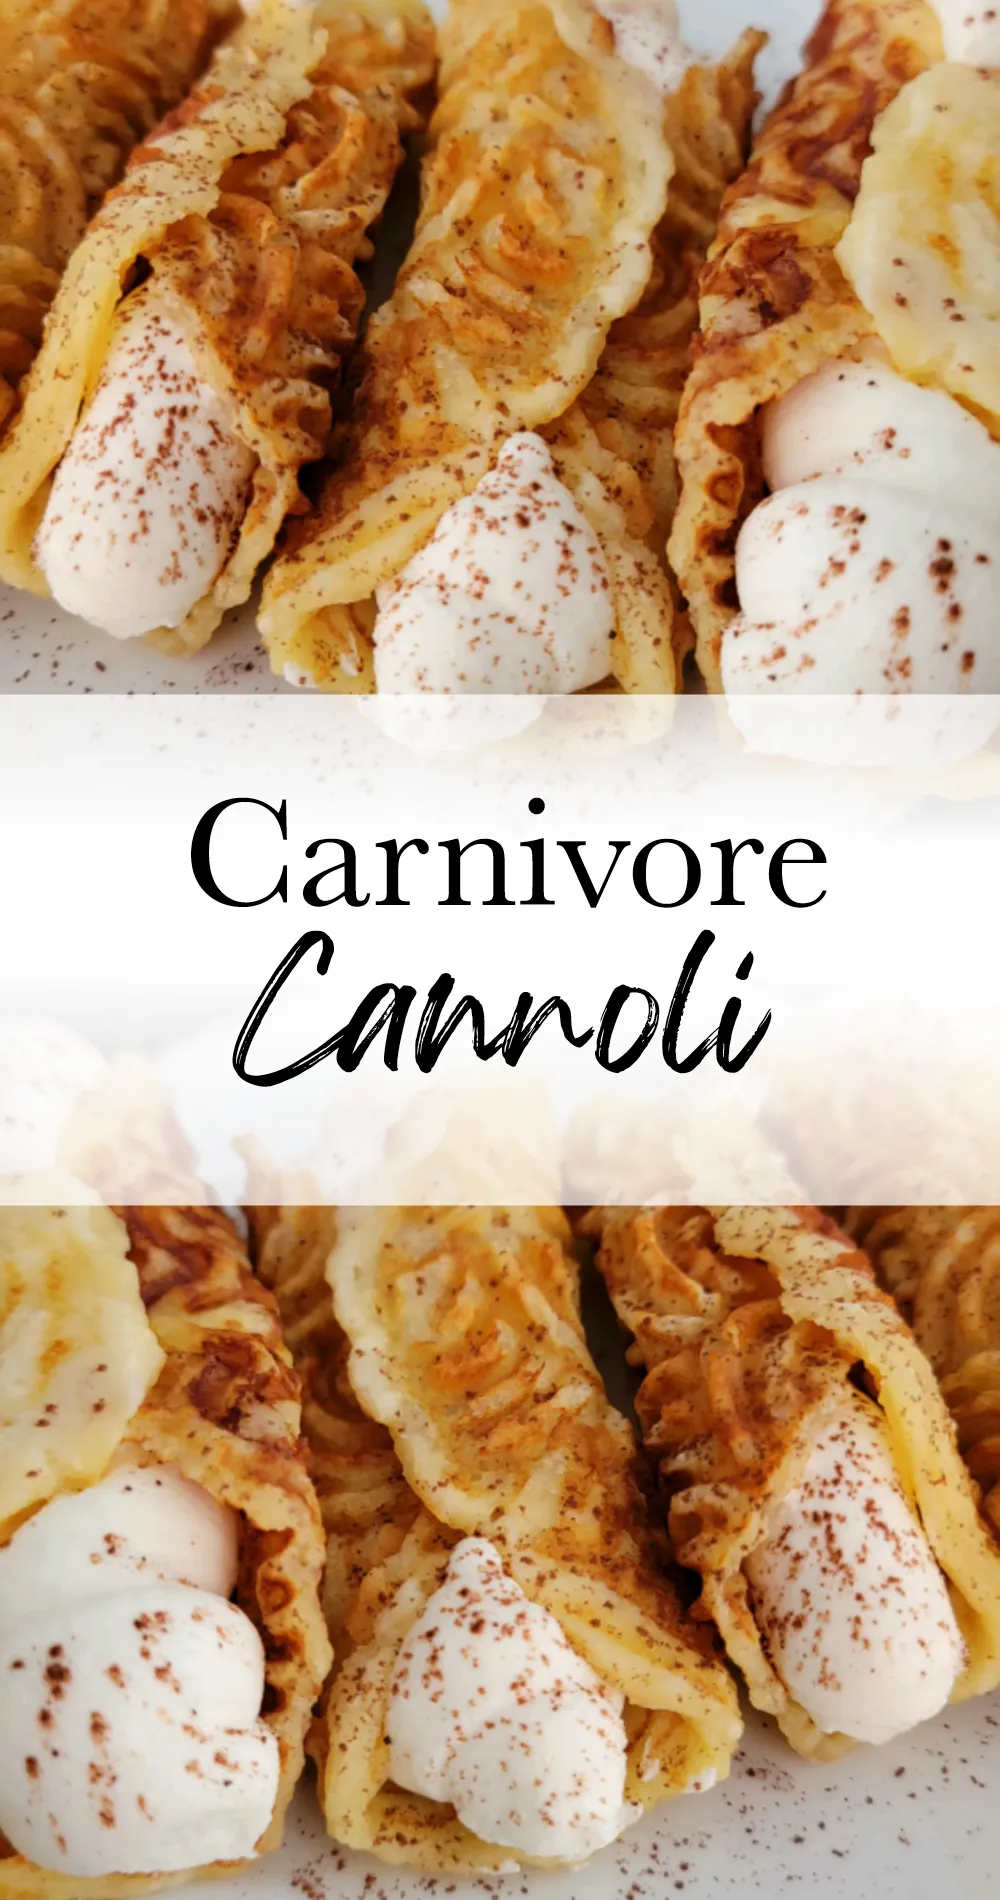
Ever bitten into a traditional cannoli and thought, “Man, I wish I could enjoy this without all the carbs”? Well, I’ve got some exciting news for you… you absolutely can! After years of experimenting with carnivore recipes, I’ve created what might be my crowning achievement: a carnivore-friendly cannoli that captures all the decadent flavors of the Italian classic without the sugar or wheat flour. This protein-rich dessert combines the creamy richness of ricotta with a surprisingly authentic shell that will satisfy even the most discerning Italian dessert lover. And let me tell you, it’s been a game-changer for my clients who thought they’d never enjoy cannoli again! 🍮
When I first attempted these low-carb cannoli, I had my doubts. But after a bit of trial and error (including one particularly tragic first attempt with whey powder), I finally cracked the code using milk protein powder. The result? A keto-friendly dessert that doesn’t just “sort of” resemble cannoli – it actually delivers that nostalgic, authentic flavor you’re craving!
#carnivorerecipes #proteindessert #lowcarbdessert #ketodessert #italianinspired #sugarfreetreat #dairyrecipes #ricottadessert #carnivorecanoli #healthytreat
This recipe is perfectly suitable for carnivore, keto, and low-carb diets. It makes an excellent treat for special occasions or whenever you need a little something sweet without derailing your health goals.
- 1. Quick Stats
- 2. Equipment Needed
- 3. Ingredients
- 4. Step-by-Step Instructions
- 5. Batch Cooking Tips
- 6. Serving & Presentation
- 7. Storage Instructions: Keeping Your Cannoli Fresh
- 8. Benefits/Why This Recipe Works
- 9. Common Mistakes to Avoid
- 10. Alternatives/Substitutions
- 11. FAQ Section
- 12. Final Thoughts
- 13. Next Recipes To Try
Quick Stats
Prep Time: 30 minutes (plus overnight straining for ricotta)
Cook Time: 8 minutes
Total Time: 38 minutes (plus straining time)
Servings: 8 cannoli
Calories: 120 per cannoli
Macros: 1g carbs, 9g fat, 8g protein
Difficulty: Medium
Equipment Needed
- Pizzelle maker (I use the Dash brand) – essential for creating the shell shapes
- Hand mixer or stand mixer
- Cheesecloth and fine mesh strainer (for draining ricotta)
- Kitchen scale for precise measurements
- Piping bag with large round tip (a 12R works perfectly)
- Small sifter
- Measuring spoons
Don’t have a pizzelle maker? While it’s the best tool for authentic shells, you could try making flat discs on a non-stick
Ingredients
For the Cannoli Shells:
- 45g (10 tablespoons) milk protein powder 🥛
- 1.3g (1/4 teaspoon) glycine powder
- 0.7g (1/4 teaspoon) cream of tartar
- 0.8g (1/8 teaspoon) baking soda
- 100g (7 tablespoons) ricotta cheese
- 32g (2 tablespoons + 1 teaspoon) unsalted butter
- 1 large egg 🥚
- 3g (1/2 teaspoon) baking powder
- 0.8g (1/3 teaspoon) beef gelatin
For the Cannoli Filling:
- 1/2 cup ricotta cheese, strained overnight 🧀
- 1/4 teaspoon almond extract
- 1/4 teaspoon
vanilla extract - Unsweetened cocoa powder for dusting (optional) 🍫
Step-by-Step Instructions
Preparing the Ricotta (Day Before)
- Strain the ricotta cheese: Line a fine mesh strainer with cheesecloth and place it over a bowl. Gently spread the ricotta cheese over the cheesecloth, making sure it’s evenly distributed. This is crucial for achieving that authentic cannoli texture!
- Refrigerate overnight: Cover the strainer and bowl with plastic wrap and place in the refrigerator for at least 8 hours, preferably overnight. This removes excess moisture from the ricotta, giving it that perfect dry, creamy texture that makes cannoli filling so divine.
Making the Cannoli Shells
- Prep your ingredients: Bring all refrigerated ingredients (cheese, eggs, butter) to room temperature for easier mixing. Trust me, this makes a world of difference in how your dough comes together.
- Preheat your pizzelle maker: Plug it in and let it heat up completely while you prepare the batter. A properly heated pizzelle maker is essential for quick cooking and proper shell formation.
- Sift dry ingredients: Measure the milk protein powder, glycine, baking soda, and cream of tartar and place them in a sifter for later use. This prevents clumping and ensures even distribution in your batter.
- Mix wet ingredients: In a small bowl, combine the softened ricotta cheese and butter. Using an electric mixer, blend until completely incorporated and smooth.
- Add egg and leavening agents: Add the egg to the cheese mixture and mix well. Then add the baking powder and beef gelatin, continuing to mix until the batter becomes slightly fluffy. The gelatin is my secret weapon here—it helps give the shells structure without wheat flour!
- Combine wet and dry: Sift the protein powder mixture over the wet ingredients and gently fold together with a spatula. Be careful not to overmix—stop as soon as everything is incorporated. Overmixing will make your shells tough rather than tender.
- Form and cook the shells: Scoop one heaping tablespoon of dough and form it into a disc shape. Place it onto the preheated pizzelle maker, positioning it slightly toward the back for even distribution when you close the lid. Cook for about 60 seconds, or until lightly golden.
- Shape while warm: Working quickly (and carefully—they’re hot!), remove the pizzelle and immediately form it into a tube shape by folding one edge over the other. Place it folded-edge-down on a flat surface to cool and set its shape. The shells harden as they cool, so you need to shape them while still warm and pliable.
- Repeat the process: Continue steps 7-8 until all the batter is used up. You should get approximately 8 cannoli shells.
Preparing the Cannoli Filling
- Prepare the strained ricotta: Take your overnight-strained ricotta and place it in a bowl. The straining process should have removed enough liquid to give the cheese a thicker, drier consistency. If it still seems too wet, you can strain it a bit longer.
- Add flavorings: Add the almond and
vanilla extracts to the ricotta. The almond extract provides a flavor similar to pistachio, which is traditional in many cannoli recipes. Mix gently with a spatula until well combined. - Prepare for piping: Fill your piping bag fitted with a large round tip. If you don’t have a piping bag, you can use a zip-top bag with the corner snipped off, though a proper piping tip makes the job much easier and neater.
Assembling the Cannoli
- Fill the shells: Pipe the ricotta filling into each end of the cannoli shells, making sure to fill them completely from end to end. Be generous—a half-filled cannoli is a sad cannoli! 😉
- Add the finishing touch: If desired, lightly dust the filled cannoli with unsweetened cocoa powder for that authentic finish and slight chocolate flavor.
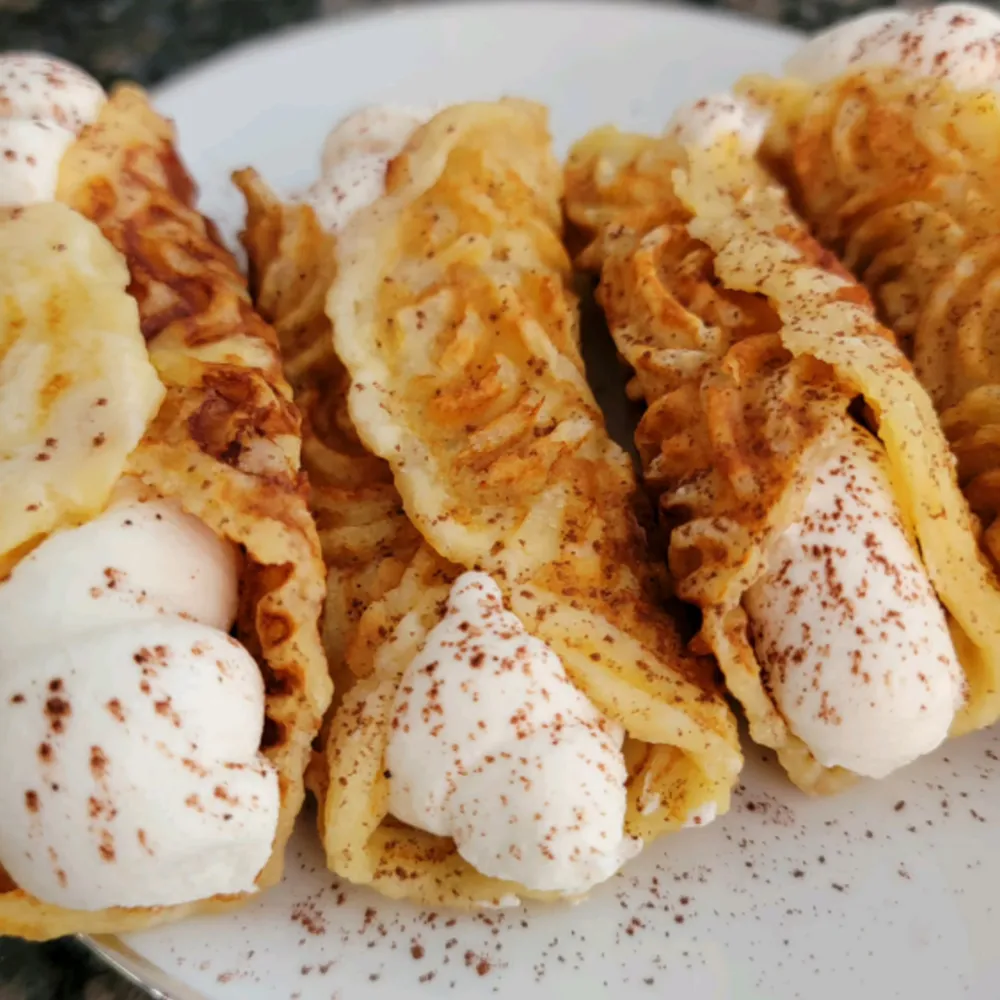
- Serve immediately: Just like traditional cannoli, these are best enjoyed fresh after filling. The moisture from the filling will eventually soften the shells if they sit too long.
Batch Cooking Tips
These carnivore cannoli don’t lend themselves particularly well to batch cooking in their assembled state, but you can prep components ahead:
- Make the shells up to 2 days in advance and store in an airtight container at room temperature.
- Prepare the filling up to 24 hours ahead and keep refrigerated.
- Fill the cannoli just before serving to maintain the shell’s texture.
For a gathering, consider setting up a “cannoli bar” where people can fill their own shells with the prepared ricotta filling!
Serving & Presentation
Plating Suggestions
For an impressive dessert presentation, try these professional styling tips:
- Arrange cannoli on a white plate with a light dusting of cocoa powder over both the plate and cannoli.
- Add a small sprig of mint for a pop of color (though technically not carnivore, it can be removed before eating).
- For a special occasion, place two cannoli crossing each other with a small pile of grated dark chocolate (100% cacao) in the center.
Complementary Recipes
These cannoli pair beautifully with other carnivore treats like:
- Carnivore Coffee Ice Cream for an Italian-inspired dessert duo
- Carnivore Hot Chocolate for the perfect after-dinner pairing
- Carnivore Cheesecake for an impressive dessert spread
Occasion Recommendations
These elegant treats are perfect for:
- Holiday gatherings (especially Italian-themed dinners)
- Dinner parties where you want to impress without revealing they’re “diet food”
- Special celebrations where traditional desserts would normally be off-limits
Storage Instructions: Keeping Your Cannoli Fresh
If you somehow manage to have leftovers (which, let’s be honest, is rare in my house!), here’s how to store them:
Unfilled Shells
- Store in an airtight container at room temperature
- Place parchment paper between layers to prevent sticking
- Will keep for 2-3 days before losing their optimal texture
Filling
- Store in an airtight container in the refrigerator
- Will keep fresh for up to 3 days
- Give it a quick stir before using if it’s been sitting
Filled Cannoli
- Once filled, the shells will gradually soften from the moisture in the filling
- Best consumed within a few hours of filling
- If necessary, store filled cannoli in the refrigerator for up to 12 hours, but know the texture will change
On-the-go option
Need to transport these beauties? Place unfilled shells in a sturdy container with the filling in a separate piping bag. Fill them on-site just before serving for the best experience!
Benefits/Why This Recipe Works
This carnivore cannoli recipe is truly a breakthrough for anyone following a carnivore or extremely low-carb diet who misses Italian pastries. Here’s why it works so beautifully:
Perfect Texture Balance
The milk protein powder creates a shell with just enough structure to hold its shape without being brittle like some keto alternatives. The beef gelatin adds elasticity that’s usually provided by gluten in traditional recipes.
Authentic Flavor Profile
By using real ricotta cheese in both the shells and filling, we maintain the authentic flavor that makes cannoli so beloved. The almond extract mimics the traditional pistachio notes without adding carbs or potential allergens.
Nutritional Powerhouse
Unlike traditional cannoli that are essentially sugar and refined carbs, these protein-rich treats provide:
- High-quality dairy proteins
- Healthy fats that support hormone production
- Almost zero carbs (just traces from the dairy)
- No inflammatory seed oils or processed ingredients
Carnivore Diet Benefits
For those following a carnivore approach, this recipe offers a way to enjoy a treat while maintaining the core principles of the diet:
- Exclusively animal-based ingredients
- No plant toxins or anti-nutrients
- Supports ketosis and fat-adaptation
- Provides satiety without blood sugar spikes
This recipe perfectly demonstrates that restrictive diets don’t have to mean deprivation—they can be an opportunity for creative reinvention of classic favorites!
Common Mistakes to Avoid
Even the most experienced cooks can run into trouble with specialized recipes like this. Here are the pitfalls to watch out for:
Shell Disasters
- Not working quickly enough when shaping: Once removed from the pizzelle maker, you have about 5-10 seconds before the shell becomes too firm to shape. Have your workspace ready!
- Overmixing the batter: This creates tough, rubbery shells instead of tender ones. Mix just until ingredients are combined.
- Incorrect temperature: If your pizzelle maker isn’t hot enough, the shells won’t cook properly; too hot, and they’ll burn before setting.
Filling Fiascos
- Not straining the ricotta long enough: Skipping or shortening this step results in watery filling that will quickly make your shells soggy. 🧀
- Over-flavoring: A little extract goes a long way—too much will overpower the delicate cheese flavor.
- Filling too far in advance: The moisture from the filling will eventually seep into the shells, making them soft and potentially soggy.
Measuring Matters
- Eyeballing ingredients: This recipe requires precision, especially with the leavening agents. Too much or too little can affect the texture dramatically.
- Not using room temperature ingredients: Cold cheese and butter won’t blend properly, resulting in a lumpy batter.
Alternatives/Substitutions
Need to adjust this recipe? Here are some tested alternatives:
Protein Powder Options
- If milk protein powder isn’t available, casein protein can work as a substitute (though the texture will be slightly different)
- For those who can tolerate it, egg white protein powder can be used with some recipe adjustments
Budget Options
- Instead of a specialized pizzelle maker, you can attempt to make flatter, cookie-style versions in a
skillet - Regular salted butter can replace unsalted—just omit any additional salt in the recipe
- Farmer’s cheese can substitute for ricotta if it’s more affordable in your area
Health-Specific Adjustments
- Higher protein: Add a tablespoon of unflavored collagen to the filling
- Higher fat: Use mascarpone cheese instead of ricotta for a richer filling
- Dairy sensitivity: Unfortunately, this specific recipe doesn’t work well without dairy, as it’s a core component
This website may contain affiliate links, which means that if you click on one of the product links, the website may receive a small commission at no extra charge to you!
FAQ Section
Q: Can I make these without a pizzelle maker?
A: While a pizzelle maker gives the most authentic results, you can try making thin discs on a non-stick
Q: How do I know when the ricotta is strained enough?
A: The ricotta should lose its watery consistency and become more like a thick paste. You’ll typically see about 2-3 tablespoons of liquid drain out from 1/2 cup of ricotta.
Q: Can I use flavored protein powder?
A: I don’t recommend it. Flavored proteins often contain sweeteners and additives that will affect the texture and taste. Stick with unflavored milk protein powder for best results.
Q: My shells are too soft/too brittle. What went wrong?
A: Soft shells usually mean they need to cook longer. Brittle shells often indicate too much protein powder or overcooking. The perfect shell should be firm but with a slight give when bitten.
Q: How sweet are these compared to traditional cannoli?
A: These are much less sweet than traditional cannoli, focusing instead on the rich dairy flavors. If you’re adapting to a carnivore diet from a standard diet, it may take time for your palate to adjust and appreciate the natural flavors.
Final Thoughts
When I first started my carnivore journey after decades in the health and fitness industry, I never imagined I’d be recreating Italian pastries without a grain of flour or spoonful of sugar. Yet here we are, with carnivore cannoli that genuinely satisfy that craving for something special and sweet.
What I love most about this recipe is how it showcases the versatility of animal-based ingredients. Who would have thought that milk protein powder could transform into something resembling a pastry shell? Or that simply strained ricotta could be so satisfying as a dessert filling? 🍮
These protein-rich treats are more than just a dessert—they’re proof that choosing a specialized diet like carnivore doesn’t mean saying goodbye to culinary joy and creativity. It’s about reimagining what’s possible within new boundaries.
So go ahead, whip up a batch of these carnivore-friendly cannoli for your next gathering, and watch as everyone—carnivore or not—reaches for seconds. Just maybe don’t tell them they’re healthy until after they’ve raved about how delicious they are!
Next Recipes To Try
If you enjoyed these Carnivore Cannoli, you might also love these animal-based treats:
- Carnivore Cheesecake Mousse – A lighter, fluffier take on cheesecake
- Carnivore Creme Brulee – An elegant custard dessert
- Carnivore Panna Cotta – A silky smooth Italian classic
- Carnivore Ice Cream – The perfect cool, creamy treat
carnivore cannoli
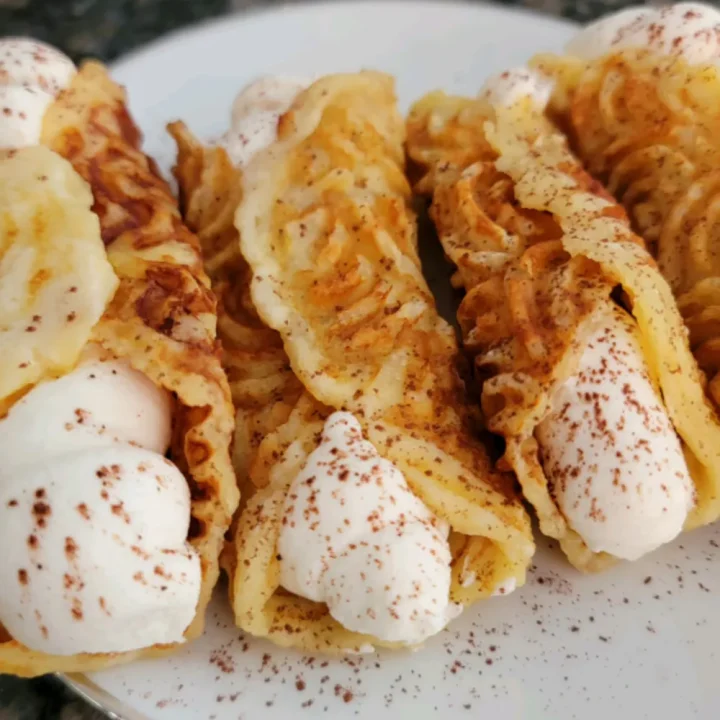
A carnivore-friendly version of the classic Italian dessert featuring milk protein powder shells and a rich ricotta filling. Perfect for special occasions or whenever you're craving something sweet without the carbs.
Ingredients
- 45g/10T milk protein powder
- 1.3g/1/4tsp glycine powder
- .7g/1/4tsp cream of tartar
- .8g/1/8tsp baking soda
- 100g/7T ricotta cheese
- 32g/2T + 1tsp unsalted butter
- 1 large egg
- 3g/1/2tsp baking powder
- .8g/1/3tsp beef gelatin
- 1/2 cup ricotta cheese, strained
- 1/4 tsp almond extract
- 1/4 tsp vanilla extract
- Unsweetened cocoa powder for dusting (optional)
Instructions
- Strain the ricotta cheese: Line a fine mesh strainer with cheesecloth and place it over a bowl. Spread ricotta evenly and refrigerate overnight.
- Prep ingredients: Bring cheese, eggs, and butter to room temperature. Preheat pizzelle maker.
- Sift dry ingredients: Measure protein powder, glycine, baking soda, and cream of tartar in a sifter.
- Mix wet ingredients: Combine softened ricotta and butter using an electric mixer until smooth.
- Add egg and leavening: Add egg, baking powder and gelatin, mixing until slightly fluffy.
- Combine wet and dry: Sift protein powder mixture over wet ingredients and gently fold together. Do not overmix.
- Form and cook shells: Scoop dough onto pizzelle maker and cook about 60 seconds until golden.
- Shape while warm: Quickly remove and form into tubes, placing folded-edge down to cool and set.
- Prepare filling: Mix strained ricotta with almond and vanilla extracts.
- Assemble cannoli: Pipe filling into shells and dust with cocoa powder if desired.
Notes
These cannoli are best eaten immediately after filling. Unfilled shells can be stored in an airtight container for 2-3 days. The filling can be refrigerated separately for up to 3 days.
Nutrition Information
Yield 8 Serving Size 1 cannoliAmount Per Serving Calories 120Total Fat 9gSaturated Fat 5gTrans Fat 0gUnsaturated Fat 4gCholesterol 45mgSodium 65mgCarbohydrates 1gNet Carbohydrates 1gFiber 0gSugar 1gProtein 8g