
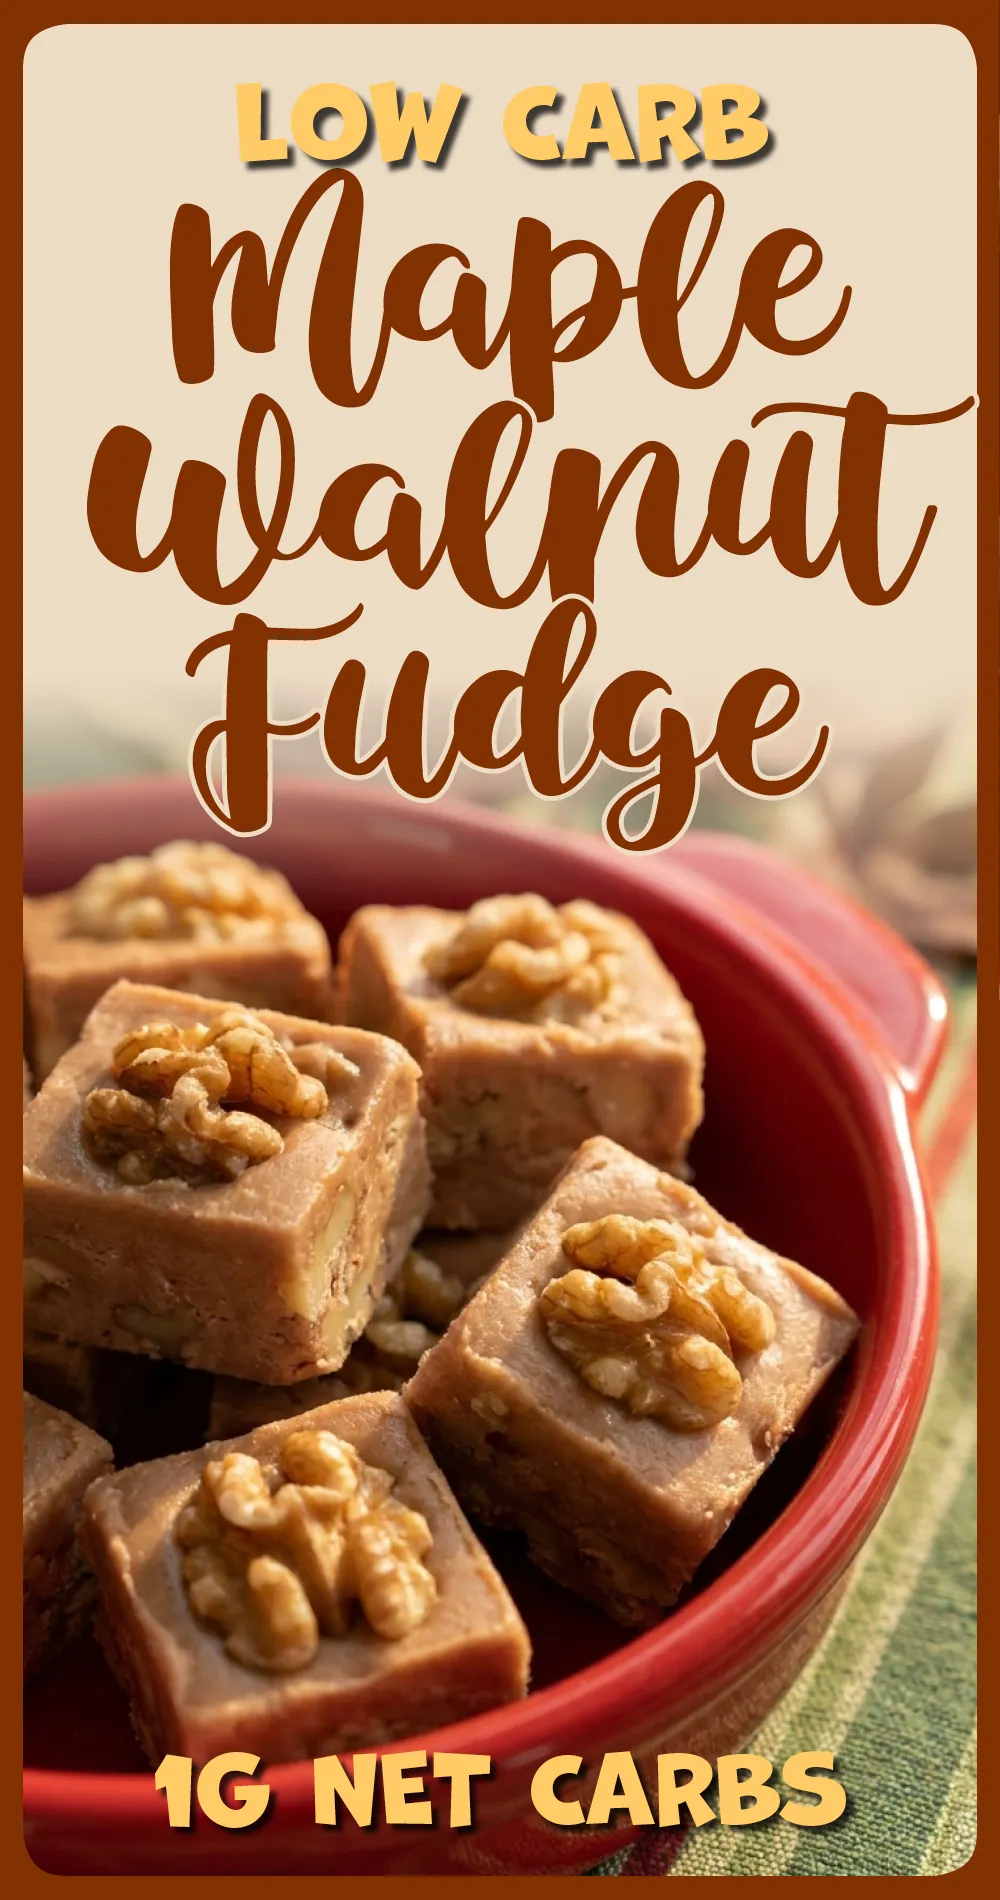
Keto Maple Walnut Fudge: The Fat Bomb Dessert That Tastes Like Cheating (But Isn’t)
Picture this… you’re standing in your kitchen, craving something sweet, rich, and downright decadent, but you’re also trying to stay in ketosis. Sound familiar? Well, I’ve got good news for you because this keto maple walnut fudge is about to become your new best friend. 🍁
I’ve been doing the low-carb thing for decades now, ever since I figured out that my childhood tummy troubles had a lot to do with the standard diets I was raised on. And let me tell you, finding a sugar-free fudge recipe that actually tastes like the real deal took me a good while to appreciate properly. This one nails it.
This keto fudge recipe is gluten-free, sugar-free, and fits perfectly into a ketogenic diet, a high-fat diet, or any low carbohydrate diet you’re following. It’s also brilliant for anyone managing diabetes or just trying to cut back on sugar without giving up dessert entirely (because let’s be honest, who wants to do that?). 😅
Whether you need a snack, a treat after dinner, or a fancy homemade gift for the holidays, this recipe checks every box. It’s rich, it’s got that old-fashioned maple flavor, and it’s got just enough crunch from the walnuts to keep things interesting.
#ketofudge #lowcarbdessert #ketorecipes #sugarfreefudge #ketodiet #fatbomb #ketosnacks #maplewalnutfudge #ketotreats #ketodessert
- 1. Quick Stats Before You Start
- 2. What You'll Need in Your Kitchen
- 3. Ingredients: Simple, Clean, and Keto-Approved
- 4. Step-by-Step: How to Make Keto Maple Walnut Fudge
- 5. Serving & Presentation Ideas
- 6. How to Store This Fudge Properly
- 7. Why This Recipe Works So Well
- 8. Common Mistakes to Avoid
- 9. Substitutions and Variations
- 10. Frequently Asked Questions
- 11. Final Thoughts
- 12. Next Recipes to Try
Quick Stats Before You Start
- Prep Time: 10 minutes
- Cook Time: 0 minutes (no stove needed!)
- Chill Time: 30-60 minutes
- Servings: 16 small squares
- Calories: ~90 per square
- Macros: High fat, low carb, moderate protein
- Net Carbs: 0.8g per square
- Difficulty: Easy (seriously, my dog could probably make this)
What You’ll Need in Your Kitchen
You don’t need fancy equipment for this one, which is honestly half the reason I love it.
- Mixing bowl – any medium-sized bowl works
- Hand blender or whisk – for smooth mixing (a fork works in a pinch)
- Rubber spatula – for scraping and folding
- Parchment paper – non-negotiable, trust me
- Storage container or small baking dish – something with straight sides works best
- Cutting board and knife – for slicing your finished fudge
FYI, if you don’t own a hand blender, don’t stress. This recipe is forgiving enough that a good old-fashioned whisk and some elbow grease will get you there.
Ingredients: Simple, Clean, and Keto-Approved
Dairy (or Dairy-Free Alternative)
- 240g (1 cup) sugar-free sweetened condensed milk OR dairy-free sweetened condensed coconut milk, room temperature
Baking & Spice
- 15ml (1 tbsp) maple extract (good quality makes a difference here)
- 3g (½ tsp) fine salt
Nuts & Toppings
- 37g (⅓ cup) walnuts, chopped into varied small pieces 🌰
- Optional: extra walnut halves for topping
That’s it. Four ingredients (five if you count the optional topping). This isn’t one of those recipes with seventeen items you need to hunt down at three different stores. IMO, simplicity is underrated in the keto world.
Step-by-Step: How to Make Keto Maple Walnut Fudge
Step 1: Make Your Condensed Milk Base First
Before you even think about fudge, you need your sweetened condensed milk ready to go. This isn’t the kind you grab off a shelf—you’re making a keto-friendly version using Lakanto Gold or a similar erythritol-monk fruit blend.
Once made, you’ll have roughly one cup (240g). This step can’t be skipped or substituted with regular condensed milk, obviously, unless you want to kick yourself out of ketosis. 😉
Step 2: Let It Cool (But Keep Stirring)
Pour your freshly made sweetened condensed milk into your mixing bowl. Let it sit for about 5 minutes, stirring constantly during this time.
Add your fine salt right here while you’re stirring. This ensures it dissolves evenly instead of leaving weird salty pockets in your finished fudge.
Step 3: Cool to Room Temperature
After the initial 5 minutes, keep stirring occasionally as the mixture cools further. You’re aiming for room temperature or just slightly warm—not hot.
Why does this matter? Because adding your maple extract too early can cause the flavor to cook off or turn bitter. Patience pays off here.
Step 4: Add the Maple Magic
Once your mixture feels just slightly warm to the touch, stir in the maple extract. Mix thoroughly to make sure every bit of that gorgeous maple flavor gets distributed evenly throughout.
Ever wondered why some fudge recipes taste flat? It’s usually because the extract wasn’t fully incorporated. Don’t rush this step.
Step 5: Fold in the Walnuts
Toss your chopped walnuts into the mixture now. Stir well, scraping the sides and bottom of your bowl as you go, to make sure everything combines into one smooth, homogeneous mixture.
I like my walnuts chopped into various small sizes rather than uniform pieces—it gives a more interesting texture with each bite. Some crunch, some smaller bits, keeps things fun.
Step 6: Pour and Smooth
Line your container with parchment paper (this makes removal so much easier later, trust me on this one). Pour your fudge mixture in and use your spatula to smooth and flatten the top.
If you want to get fancy, press some walnut halves gently into the top now. This helps them stick once the fudge sets, and honestly, it just looks more impressive when you’re serving it to guests. 🌟
Step 7: Chill Until Set
Cover your container with cling wrap and pop it in the fridge. Give it 30 to 60 minutes to set completely—no shortcuts here, as tempting as it might be to sneak a taste early.
Step 8: Slice and Serve
Once set, lift the fudge out using the parchment paper and place it on a cutting board. Peel away the parchment and slice into small squares.
I cut mine smaller than you would with regular sugar-laden fudge, simply because this stuff is rich. A little goes a long way, which honestly makes it more budget-friendly per serving too.
Batch Cooking Tip
Want to make a bigger batch for holiday gifting or meal prep? Simply double or triple the recipe using a larger container, keeping the same ratios. Just remember that a bigger batch might need slightly longer chill time to set fully.

Serving & Presentation Ideas
For a festive touch, arrange your fudge squares on a decorative plate with extra chopped walnuts scattered around. It photographs beautifully for Pinterest, which, let’s be honest, is half the fun of making something like this. 📸
Pair this fudge with a warm mug of Keto Hot Chocolate for the ultimate cozy dessert combo. It also works wonderfully alongside other holiday treats like Keto Pecan Pralines or Keto Rum Balls on a dessert platter.
This fudge shines at holiday gatherings, as a homemade gift wrapped in a cute tin, or honestly, just as a Tuesday night treat because you deserve it. Drizzle with a little Keto Caramel Sauce if you’re feeling extra indulgent.
How to Store This Fudge Properly
Store your fudge in an airtight container in the fridge, where it’ll stay fresh for 3-4 weeks. That’s assuming you can resist eating it all before then, which, IMO, is a big assumption. 😂
For longer storage, freeze it for several months—perfect if you’re making batches ahead for holiday gifting. Just thaw in the fridge before serving.
No reheating needed here since this is a chilled treat, not a baked one. For on-the-go snacking, portion individual squares into small containers or bags for easy grab-and-go fat bombs throughout your week.
Why This Recipe Works So Well
This keto maple walnut fudge hits that sweet spot between indulgent and functional. With a macronutrient ratio of 12.3:1, it’s essentially a fat bomb disguised as dessert.
Here’s what makes it worth your time:
- High-fat content supports ketosis and keeps you satiated
- Only 0.8g net carbs per square means minimal impact on blood sugar
- No sugar, no grain – suitable for diabetic, celiac, and Banting diets too
- Walnuts add healthy fats plus a satisfying crunch and mild nutritional boost
- Rich, velvety texture that genuinely rivals traditional fudge
I’ve made plenty of keto desserts over the years, and this one consistently surprises people who assume “sugar-free” means “flavor-free.” It doesn’t. Not even close.
Common Mistakes to Avoid
Even with a simple recipe like this, a few things can trip you up. 🚫
- Adding maple extract too early: This can cause the flavor to weaken or turn bitter. Wait until the mixture cools to room temperature.
- Skipping the parchment paper: Trust me, removing set fudge from a bare container is a nightmare. Line it properly.
- Not stirring enough: Lumpy fudge happens when you rush the mixing process. Take your time folding everything together.
- Cutting pieces too large: This fudge is rich! Smaller squares mean you can actually enjoy multiple pieces without feeling overwhelmed.
Substitutions and Variations
Want to switch things up? Here’s how:
- Nut swap: Replace walnuts with pecans for a slightly different flavor profile—both work beautifully with maple.
- Dairy-free version: Use dairy-free sweetened condensed coconut milk instead of the traditional version for a completely dairy-free treat.
- No nuts at all: Skip the walnuts entirely for a smooth, ultra-creamy maple fudge. Still delicious, just different texture.
- Budget option: Buy walnuts in bulk rather than pre-chopped bags—it’s noticeably cheaper and you control the size of the pieces.
For those focused on strict macros, keep portions small and track your sweetened condensed milk brand carefully, as erythritol content can vary slightly between products.
Frequently Asked Questions
Q: Can I use regular sweetened condensed milk instead of the keto version?
A: No, that defeats the entire purpose of keeping this low-carb. Stick with the sugar-free version to maintain ketosis.
Q: How long does this fudge stay stable at room temperature?
A: About an hour, sometimes longer depending on how warm your room is. It’s more stable than regular fudge, actually, thanks to the sweetened condensed milk base.
Q: Can I use maple syrup instead of maple extract?
A: I’d recommend sticking with extract for concentrated flavor without added carbs. If you want a maple syrup element, try my Keto Maple Syrup recipe as a drizzle on top instead.
Q: Is this recipe suitable for people with diabetes?
A: Yes, thanks to the low net carb count and lack of added sugar, this fits well within diabetic-friendly eating patterns.
Q: Can I make this nut-free?
A: Absolutely. Simply omit the walnuts for a smooth version, or try sunflower seeds for a bit of crunch without the tree nuts.
This website may contain affiliate links, which means that if you click on one of the product links, the website may receive a small commission at no extra charge to you!
Final Thoughts
This keto maple walnut fudge proves that you don’t need sugar to create something genuinely satisfying. It’s rich, it’s simple, and it fits seamlessly into a low carb diet without sacrificing that old-fashioned dessert experience we all crave sometimes.
I’ve compared this to fudge I had years ago from a little shop in Stratford, Ontario, long before I went keto, and honestly? This holds its own. If you’re new to the ketogenic diet or just looking for smarter dessert options, this recipe belongs in your rotation. For more foundational guidance, check out our Keto Diet for Beginners guide.
Give it a try, share it with friends, and enjoy every velvety, maple-scented bite. 🍂
Next Recipes to Try
Loved this fudge? Here are a few more treats worth adding to your recipe box:
keto maple walnut fudge
A rich, velvety keto maple walnut fudge made with sugar-free sweetened condensed milk, real maple extract, and crunchy walnuts. This easy no-bake fat bomb is perfect for keto, low-carb, gluten-free, and diabetic diets, and makes an excellent homemade holiday gift.
Ingredients
- 240g (1 cup) sugar-free sweetened condensed milk or dairy-free sweetened condensed coconut milk, room temperature
- 15ml (1 tbsp) maple extract
- 3g (1/2 tsp) fine salt
- 37g (1/3 cup) walnuts, chopped
- Optional: walnut halves for topping
Instructions
- Prepare the base: Make a batch of sugar-free sweetened condensed milk or dairy-free condensed coconut milk (approximately 240g/1 cup).
- Cool and season: Pour into a mixing bowl, stir constantly for 5 minutes, adding the fine salt during this time.
- Continue cooling: Let the mixture cool to room temperature, stirring occasionally.
- Add maple flavor: Once slightly warm, stir in the maple extract thoroughly until fully combined.
- Fold in walnuts: Add chopped walnuts and stir well, scraping the sides and bottom of the bowl until homogeneous.
- Pour and smooth: Transfer mixture into a parchment-lined container and smooth the top with a spatula. Optionally press walnut halves on top.
- Chill: Cover with cling wrap and refrigerate for 30-60 minutes until set.
- Slice and serve: Lift out using the parchment, remove paper, and cut into small squares.
Notes
Store in an airtight container in the fridge for 3-4 weeks, or freeze for several months. Fudge is stable at room temperature for about an hour when serving.
Nutrition Information
Yield 16 Serving Size 1 squareAmount Per Serving Calories 90Total Fat 8gSaturated Fat 3gTrans Fat 0gUnsaturated Fat 5gCholesterol 10mgSodium 45mgCarbohydrates 1gNet Carbohydrates 0.8gFiber 0.3gSugar 0.5gProtein 2g